The Hidden Variable Recipes Don't Control
A recipe can tell you to cook chicken thighs over "medium-high heat for six minutes per side." What it can't account for is whether your burner runs hot, how thick your pan is, or whether your chicken came straight from the refrigerator. Those variables all affect what actually happens in the pan - and they matter more than the recipe's instruction ever could.
Temperature is the mechanism behind every cooking outcome you care about: browning, texture, moisture retention, and flavor development. Once you understand what's happening at different heat levels, you stop relying on instructions alone and start reading your pan directly.
For a broader look at how heat and technique interact, see our guide on dry heat vs. moist heat cooking methods.
What Happens at Each Temperature Zone
Think of your stovetop in three rough zones:
- Low heat (under 300°F): Fats melt, aromatics soften, and moisture slowly evaporates. Ideal for caramelizing onions, melting chocolate, or holding a sauce without scorching. Food will not brown at this level - it will stew in its own moisture.
- Medium heat (300°F-375°F): Eggs set, fish cooks through gently, and sautéed vegetables become tender. Some browning is possible if the surface is dry, but this zone is primarily about cooking through without burning.
- High heat (375°F and above): This is where the Maillard reaction - the chemical process responsible for browning and deep savory flavor - kicks into full gear. Searing steaks, crisping chicken skin, and stir-frying all require this zone.
The Maillard reaction begins around 280°F-330°F at the food's surface, but reaching those surface temperatures quickly requires your pan to be significantly hotter, especially when cold food is introduced.
280°F-330°F
Temperature where Maillard browning begins
Food science references consistently place the onset of the Maillard reaction - the process responsible for browned, savory flavors - in this surface-temperature range.
50°F-100°F
Pan temperature drop when cold food is added
Culinary educators commonly cite this range to illustrate why preheating and tempering cold proteins before cooking produces better browning results.
~400°F
Typical smoke point of refined cooking oils
Most refined neutral oils such as vegetable or canola oil smoke at approximately 400°F - a useful ceiling when setting high-heat cooking temperatures.
Why Preheating Is Non-Negotiable
Adding food to a cold or underheated pan is the most common stovetop mistake. When proteins like chicken, beef, or eggs hit a surface that isn't fully hot, they bond to the metal at a molecular level before heat can create a releasing layer of steam. The result: food tears when you try to flip it, and you lose the crust you were working toward.
The fix is straightforward. Place your empty pan over the burner for one to three minutes before adding fat. For cast iron, allow extra time - the material holds heat well but takes longer to reach an even temperature throughout. Add oil or butter only once the pan is preheated, then wait for it to shimmer (for oil) or foam and subside (for butter) before adding food.
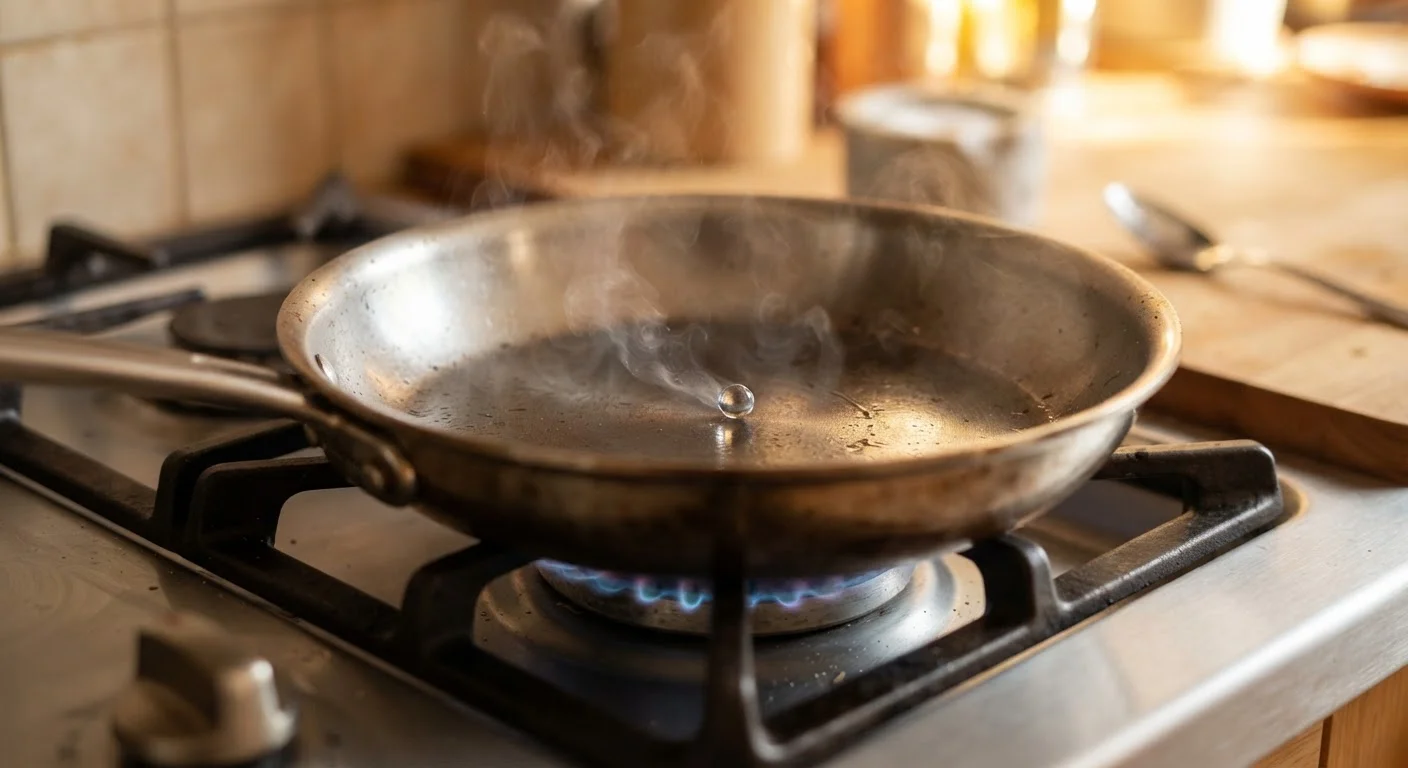
The water-droplet test is your best friend here. A small drop of water should skitter across the surface in a single bead - this is the Leidenfrost effect, where a thin vapor layer forms beneath the water droplet. That's your signal the pan is ready.
Cold Food, Hot Pan: The Temperature Drop Problem
Even a correctly preheated pan loses significant heat the moment cold food hits it. A refrigerator-cold chicken breast can drop the pan surface temperature by 50°F to 100°F in seconds - enough to shift cooking from searing to steaming. That's why thick cuts often end up with a gray exterior instead of a proper brown crust.
Two practical habits help: First, take proteins out of the refrigerator 20-30 minutes before cooking to take the chill off. Second, avoid crowding the pan. Packing in too much food at once amplifies the temperature drop and traps released moisture, turning your sear into a braise. Cook in batches when needed.
Understanding how different techniques use these principles is worth exploring. Our breakdown of sautéing, pan-frying, and stir-frying shows how each method manages heat and motion differently.
Applying This to Your Everyday Cooking
You don't need a thermometer clipped to your pan to cook well - though an infrared thermometer is a genuinely useful tool for learning. What you need is the habit of checking your pan before you add anything to it, and the patience to let it reach the right zone.
One practical shift: stop adjusting the heat reactively after food is already in the pan. Instead, set the right temperature before food goes in, then make smaller adjustments once cooking is underway. This front-loads your attention where it matters most.
For a deeper look at how a well-managed hot pan translates into more than just a sear, our guide on building a pan sauce through deglazing picks up right where this leaves off - those browned bits on the bottom are only there if your pan was hot enough to create them.
Test Your Pan Before Every Cook
Make the water-droplet test a reflex, not an occasional check. Flick a few drops of water into your preheated pan: if they form a single bead that glides and evaporates within seconds, you're in the right zone for searing. If they evaporate on contact with a sharp hiss, the pan is warm but not ready. This takes three seconds and saves you from the most common stovetop mistake.