Why Knife Skills Matter More Than You Think
Most home cooks never formally learn how to use a knife - they pick up habits by watching others or figuring it out as they go. The result is prep that takes twice as long, pieces that cook unevenly, and an unnecessary risk of cuts. Knife skills sit at the foundation of nearly every cooking task, from slicing an onion to breaking down a whole chicken.
Beyond speed and safety, there's a consistency payoff. When your carrot slices are all the same thickness, they finish cooking at the same time. When your garlic is uniformly minced, it distributes flavor evenly through a dish. Good technique makes food taste better - not just look better. Pair strong knife work with a well-organized prep station, and the whole cooking process becomes calmer and more enjoyable.
How to Hold a Knife Properly
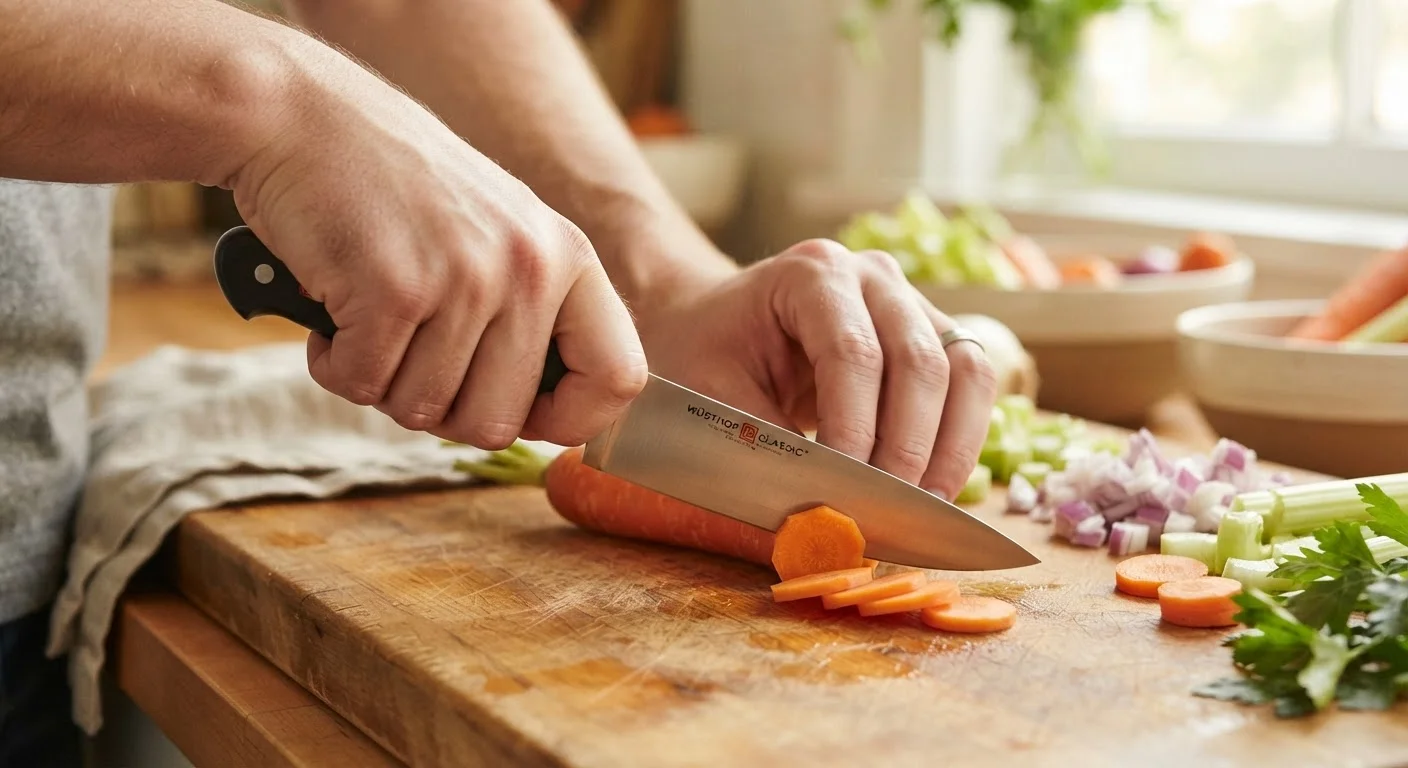
The single most important upgrade any home cook can make is switching to the pinch grip. Instead of wrapping all four fingers around the handle, move your index finger and thumb forward to pinch the flat sides of the blade just in front of the bolster (the thick collar between blade and handle). Your remaining three fingers curl around the handle.
This feels awkward at first, but it dramatically improves control, reduces wrist fatigue, and keeps the knife from twisting during a cut. Your non-knife hand is equally important. Form a claw by curling your fingertips inward so your knuckles face the blade. The side of the blade then rides against your knuckles on each stroke - your fingertips are never exposed.
Pinch grip
A knife-holding technique where you pinch the blade itself between your thumb and index finger just in front of the handle, giving you better control and balance.
Claw hand
A protective hand position where you curl your fingertips inward so your knuckles guide the blade, keeping fingertips safely away from the cutting edge.
Rocking chop
A cutting motion where the tip of the knife stays on the board while the heel rocks up and down, useful for chopping herbs and aromatics quickly.
Julienne
A cut that produces long, thin matchstick-shaped strips, typically about 2-3 inches long and 1/8 inch thick.
Chiffonade
A technique for cutting leafy herbs or greens into fine ribbons by stacking, rolling, and slicing them thinly crosswise.
Honing
Using a honing steel to realign the microscopic edge of a knife blade without removing significant metal - keeps the edge straight between sharpenings.
The Core Cutting Techniques
A handful of cuts covers nearly everything you'll encounter in everyday recipes:
- Slice: A single smooth stroke that produces flat, even pieces. Used for proteins, mushrooms, and most vegetables.
- Dice: Three-step process - trim to a flat surface, make vertical cuts, then crosswise cuts - producing uniform cubes. Small dice is roughly 1/4 inch; medium is 1/2 inch; large is 3/4 inch.
- Mince: Fine, irregular pieces produced by holding the knife tip on the board and rocking the heel rapidly back and forth. Standard for garlic, ginger, and fresh herbs.
- Julienne: Stack trimmed planks and cut them into thin matchstick strips. Common for stir-fry vegetables and garnishes.
- Chiffonade: Stack herb or leafy green leaves, roll them into a tight cylinder, and slice across the roll into thin ribbons. Ideal for basil and mint.
Each of these cuts appears regularly in recipes. If you're unsure about terminology, The Home Cook's Glossary of Essential Cooking Terms explains these and dozens of other common instructions in plain language.
Cut Size Affects Cooking Time
Recipes specify cut sizes for a reason: smaller pieces cook faster and larger pieces cook more slowly. When all your pieces are uniform, everything in the pan finishes at the same time. Uneven cuts often produce a mix of overcooked and undercooked food in the same dish.
Safety Habits That Prevent Accidents
Good knife safety is mostly about consistent habits, not special equipment. Follow these practices every time you cut:
- Stabilize your board. A sliding board is the leading cause of accidental cuts. Place a damp towel or non-slip mat underneath.
- Never try to catch a falling knife. Step back and let it fall. Attempting to grab it mid-air almost always results in a cut.
- Keep knives off the edge of the counter. Store them in a block, on a magnetic strip, or in blade guards - never loose in a drawer where you could reach in blindly.
- Cut away from your body. The knife should travel away from you or downward, never toward your torso or free hand.
- Walk with the blade pointed down. If you need to carry a knife across the kitchen, hold it flat along your thigh, tip pointing toward the floor.
Never Use a Wet or Slippery Cutting Surface
A sliding cutting board is one of the most common causes of kitchen cuts. Always place a damp towel or rubber mat beneath the board before you begin. Avoid cutting on smooth plates or slippery surfaces - stability is non-negotiable.
Keeping Your Knife Sharp and Ready
A sharp knife is the single biggest contributor to safe, efficient cutting. Dull blades require more force, which makes them more likely to slip. Two distinct tools maintain an edge:
Honing steel: Realigns the microscopic edge of the blade without removing metal. Run the blade down the steel at roughly a 15-20 degree angle, alternating sides, before or after each cooking session. This should be a quick, routine habit.
Whetstone or pull-through sharpener: Actually grinds the blade to create a new edge. For most home cooks, a few times per year is sufficient. Whetstones produce the best results but require practice; pull-through sharpeners are simpler but remove more metal over time.
Store knives properly - on a magnetic strip or in a block - so edges aren't constantly nicked against other utensils. Once your prep skills are solid, pair them with a well-thought-out approach to mise en place and reading recipes thoroughly before you start to make every cooking session run smoothly from start to finish.
Prep Your Station Before You Cut
Place a damp kitchen towel or non-slip mat under your cutting board to keep it from sliding. Set up your ingredients and containers before you start cutting - this is the heart of mise en place. See how to do it well in our guide on kitchen setup and mise en place.